xpath学习

Xpath学习

xpath介绍

xpath解析原理:

1.实例化一个etree对象,将需要被解析的页面源码加载到该对象中

2.调用etree对象中的xpath方法结合xpath解析式进行标签的定位和内容的获取

环境安装:pip install lxml

Element对象:

xml结构(包括html)文档的重要部分,表示文档中的标签元素,并且提供了一些方式来进行访问和操作这些元素,包括:

1.元素名
2.元素属性
3.父子元素
4.文本内容
5.操作方法

1
2
3
4
5
6
7
8
9
10
11
12
13
14
15
16
17
18
19
20
21
22
23
#!/usr/bin/env python

from lxml import etree
text = """
<div>
<ul>
<li class="item-0"><a href="link1.html">1-item</a></li>
<li class="item-1"><a href="link2.html">2-item</a></li>
<li class="item-0"><a href="link3.html">3-item</a></li>
<li class="item-1"><a href="link4.html">4-item</a></li>
<li class="item-1"><a href="link5.html">5-item</a></li>
<li class="item-0"><a href="link6.html">6-item</a></li>
</ul>
</div>
"""
# 1.使用etree.HTML 方法将html文本解析为element对象
html = etree.HTML(text)
# 2.使用etree.toString()方法可以将element对象转换为html文本
result = etree.tostring(html)
print(result.decode('utf-8'))

with open('a.html','w') as file:
file.write(text)

image-20231027113309001

**etree.HTMLParser()**:html解析器对象,常用参数如下:

1
2
3
4
remove_commnets(默认是false):移除html文档中的注释
remove_blank_text(默认是false):移除html文档中空白文本节点
recover(默认是false):尝试修复损坏的html文档
encoding(默认是None):指定html的编码方式
1
2
3
4
5
6
7
8
9
10
11
#!/usr/bin/env python
import html
from lxml import etree


#创建一个自定义的html解析器
parser = etree.HTMLParser(remove_comments=True,remove_blank_text=True,recover=True)

html = etree.parse('a.html',parser)
result = etree.tostring(html)
print(result.decode('utf-8'))

image-20231027114613555

自动去除注释和修复

image-20231027114627062

xpath使用

a.html:

1
2
3
4
5
6
7
8
9
10
11
12
13
14
<!-- d4a6sd4as56d13das1d7a3 -->

<div>
<ul>
<li class="item-0"><a href="link1.html">1-item</a></li>
<li class="item-1"><a href="link2.html">2-item</a></li>
<li class="item-0"><a href="link3.html">3-item</a></li>
<li class="item-1"><a href="link4.html">4-item</a></li>
<li class="item-1"><a href="link5.html">5-item</a></li>
<li class="item-0"><a href="link6.html">6-item</a></li>
</ul>

</div>

首先将网页转换为element对象

1
2
#将网页转换为element对象
html = etree.parse('a.html',etree.HTMLParser())
1
2
3
4
5
6
7
8
9
10
11
12
13
14
15
16
17
18
19
20
21
22
23
24
25
26
27
28
29
30
31
32
33
34
35
36
37
38
39
40
41
42
43
44
45
46
47
48
49
50
51
52
53
54
55
56
57
58
59
60
61
62
63
64
65
66
67
68
69
70
71
72
73
74
75
76
77
78
79
80
81
82
83
84
85
86
87
88
89
90
91
92
93
94
95
96
97
98
99
100
101
102
103
104
105
106
107
108
109
110
111
112
113
114
115
116
117
118
119
120
121
#使用xpath查询 '//*'标识选取所有的节点,无论类型和名称
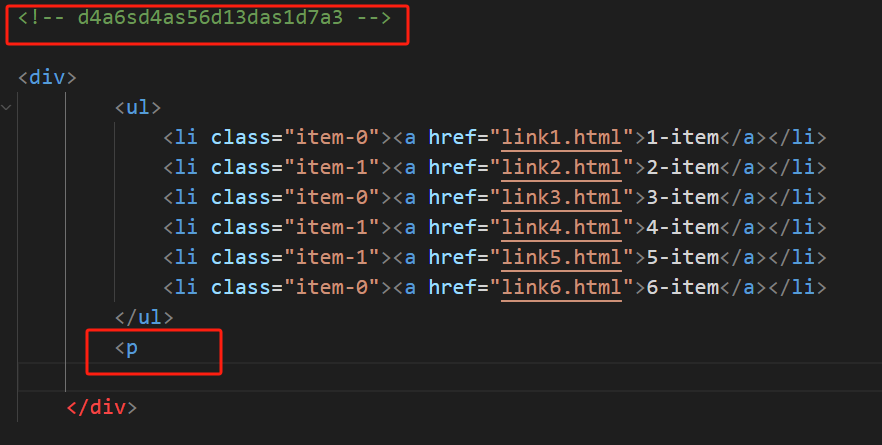
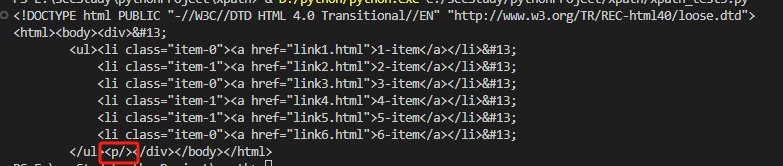
result = html.xpath('//*')
print(result)
结果:
[<Element html at 0x2a97b4dbb00>, <Element body at 0x2a97b4dba80>, <Element div at 0x2a97b4dbb40>, <Element ul at 0x2a97b4dbb80>, <Element li at 0x2a97b4dbbc0>, <Element a at 0x2a97b4dbc40>, <Element li at 0x2a97b4dbc80>, <Element a at 0x2a97b4dbcc0>, <Element li at 0x2a97b4dbd00>, <Element a at 0x2a97b4dbc00>, <Element li at 0x2a97b4dbd40>, <Element a at 0x2a97b4dbd80>, <Element li at 0x2a97b4dbdc0>, <Element a at 0x2a97b4dbe00>, <Element li at 0x2a97b4dbe40>, <Element a at 0x2a97b4dbe80>]

#查询li标签
result = html.xpath('//li')
print(result)
结果:
[<Element li at 0x2230f19ba40>, <Element li at 0x2230f19bb00>, <Element li at 0x2230f19bb40>, <Element li at 0x2230f19bb80>, <Element li at 0x2230f19bbc0>, <Element li at 0x2230f19bc40>]

#通过/或者//查找子节点or子孙节点
#选取所有位于li标签内的a标签
#//li/a (li标签内的a标签)子标签
#获取所有的子孙节点//
result = html.xpath("//li/a")
print(result)
结果:
[<Element a at 0x2bfad419b40>, <Element a at 0x2bfad419c00>, <Element a at 0x2bfad419c40>, <Element a at 0x2bfad419c80>, <Element a at 0x2bfad419cc0>, <Element a at 0x2bfad419d40>]

# //element[@attribute='value']
# //表示从文档的根开始搜索
# element要选择元素的名称
# @attribute 要筛选的属性名称
# value 要匹配的属性的值
result = html.xpath("//li[@class='item-0']")
print(result)
结果:
[<Element li at 0x296ed746c80>, <Element li at 0x296ed746cc0>, <Element li at 0x296ed746d00>]

#父节点:..来实现
result = html.xpath('//a[@href="link6.html"]/../@class')
print(result)
result = html.xpath('//a[@href="link6.html"]/parent::*/@class')
print(result)
结果:
['item-0']

#文本获取 text()
result = html.xpath("//li[@class='item-1']/a/text()")
print(result)
结果:
['2-item', '4-item', '5-item']

#匹配属性的内容
result = html.xpath("//li/a/@href")
print(result)
结果:
['link1.html', 'link2.html', 'link3.html', 'link4.html', 'link5.html', 'link6.html']


#属性获取:
#有些节点,有多个属性,有些属性多个值 使用contains
text = '''
<li class="li item-0"><a href="link1.html">1-item</a></li>
'''
html = etree.HTML(text)
result = html.xpath('//li[contains(@class,li)]/a/text()')
print(result)
结果:
['1-item']


#属性获取:
#有些节点,有多个属性,有些属性多个值
text = '''
<li class="li item-0" name="r1cky"><a href="link1.html">1-item</a></li>
<li class="li item-0"><a href="link1.html">2-item</a></li>
'''
html = etree.HTML(text)
result = html.xpath('//li[contains(@class,li) and @name="r1cky"]/a/text()')
print(result)
结果:
['1-item']

xpath节点的运算符
= :判断两个值是否相等
!=
<
>
>=
<=
逻辑运算符
and
or
not
字符串运算符:
concat():将多个字符串连接
starts-with():检查字符串是否以指定的前缀开头
contains():检查是否包含某个字符串
substring():从字符串截取子字符串
数字运算符:
+
-
*
/
%

按顺序选择
在标签中使用[]标识位置
last()最后一个
position()查询指定为位置的前几位

#只要第一个li节点里的a元素的文本 使用[] 从1开始
result = html.xpath('//li[1]/a/text()')
print(result)
#只要最后个li节点里的a元素的文本 使用[last()]
result = html.xpath('//li[last()]/a/text()')
print(result)
#查询前两个元素下的a标签的文本
result = html.xpath('//li[position()<3]/a/text()')
print(result)
#查询倒数第3个
result = html.xpath('//li[last()-2]/a/text()')
print(result)
结果:
['1-item']
['6-item']
['1-item', '2-item']
['4-item']

小练习

1
2
3
4
5
6
7
8
9
10
11
12
13
14
15
16
17
18
19
20
21
22
23
24
25
26
27
28
29
30
31
32
33
34
35
36
37
38
39
#!/usr/bin/env python
import html
from lxml import etree

text = '''
<html>
<body>
<div class="item" id="item1">item 1</div>
<div class="item" id="item2">item 2</div>
<div class="item" id="item3">item 3</div>
<div class="price">price:$50</div>
</body>
</html>
'''
tree = etree.HTML(text)
xpth_exp = '//div[contains(@class,"item") or contains(@price,"item")]/text()'
result = tree.xpath(xpth_exp)
print(result)

#查询价格大于40的div内容
xpth_exp = '//div[contains(text(),"$") and number(substring-after(text(),"$"))> 40]/text() '
result = tree.xpath(xpth_exp)
print(result)

#查询第二个div元素的内容
xpth_exp = '//div[position()=2]/text()'
result = tree.xpath(xpth_exp)
print(result)

#查询第1个和最后一个div元素的内容
xpth_exp = '//div[position()=1]/text() | //div[position()=last()]/text()'
result = tree.xpath(xpth_exp)
print(result)

结果:
['item 1', 'item 2', 'item 3']
['price:$50']
['item 2']
['item 1', 'price:$50']

xpath项目

目标:https://www.4399dmw.com/search/dh-1-0-0-0-0-0-0/

image-20231027161328409

需求

1.抓取图片和名称

2.抓取到图片和名称之后,保存到本地

3.从本地发送到远程服务器

分析

  • 抓取图片xpath分析

image-20231027163832348

1
result = html.xpath('//div[@class="lst"]/a[@class="u-card"]/img/@data-src')

image-20231027164114062

  • 抓取标题xpath

image-20231027164655892

1
result = html.xpath('//div[@class="lst"]/a[@class="u-card"]/div[@class="u-ct"]/p[@class="u-tt"]/text()')

image-20231027164736772

  • 配置参数:

随机UA

headers(UA,cookie,Referer)

代理,免费代理网站:https://proxyscrape.com/free-proxy-list

zip函数,将两个列表组合

image-20231115111910958

  • 翻页url

image-20231115114145578

抓取属性为next的a标签中的href属性然后拼接即可

1
result = html.xpath('//a[@class="next"]/@href')

整体代码

1
2
3
4
5
6
7
8
9
10
11
12
13
14
15
16
17
18
19
20
21
22
23
24
25
26
27
28
29
30
31
32
33
34
35
36
37
38
39
40
41
42
43
44
45
46
47
48
49
50
51
52
53
54
55
56
57
58
59
60
61
62
63
64
65
66
67
68
69
70
71
72
73
74
75
76
77
78
79
80
81
82
83
84
85
86
87
88
89
90
91
92
93
94
95
96
97
98
99
100
101
102
103
104
105
106
107
108
109
110
111
112
113
114
115
116
117
118
119
120
121
122
123
124
125
126
127
128
129
#!/usr/bin/env python

from lxml import etree
import requests
import logging
import random
from fake_useragent import UserAgent #使用随机UA
import os

ua = UserAgent()
logging.basicConfig(level=logging.INFO,
format='%(asctime)s - %(levelname)s : %(message)s')

url = "https://www.4399dmw.com/search/dh-1-0-0-0-0-0-0/"
filepath = "E:\\secStudy\\pythonProject\\xpath\\http_proxies.txt"

#读取代理列表
def read_proxy_file(filepath):
proxy_list = []
try:
with open(filepath,'r') as file:
for line in file:
line.strip()
if line:
proxy_list.append(line.strip())
except FileExistsError:
logging.error("文件未找到")
except Exception as e:
logging.error(f"发生错误:{e}")
#print(proxy_list)
return proxy_list

#从代理列表中随机取一个代理
def get_proxy():
proxy = random.choice(read_proxy_file(filepath))
return {"http":proxy}

#通过链接保存图片
def save_image(img_url,img_name):
headers = {
"User-Agent":ua.random,
"Cookie":"UM_distinctid=18b703032a8f0b-02226ea1833d6e-26031151-384000-18b703032a91af9; Hm_lvt_6bed68d13e86775334dd3a113f40a535=1698394289; a_180_90_index=1; CNZZDATA3217746=cnzz_eid%3D663098020-1698394289-%26ntime%3D1698394702; Hm_lpvt_6bed68d13e86775334dd3a113f40a535=1698394702; a_980_90_index=1; a_200_90_index=5",
"Referer":"https://www.4399dmw.com/donghua/"
}
try:
img = requests.get(url=img_url,headers=headers)
image_name = img_name + '.jpg'
with open(image_name,'ab') as f:
f.write(img.content)
except Exception as e:
logging.error(e)

#指定图片文件存储路径
def mk_dir(path):
#判断目录是否存在
#os.path.exists判断是否存在路径
#os.path.join链接路径和文件名
is_exist = os.path.exists(os.path.join("E:\\secStudy\\pythonProject\\xpath\\image_dir",path))
if not is_exist:
#创建文件夹
os.mkdir(os.path.join("E:\\secStudy\\pythonProject\\xpath\\image_dir",path))
os.chdir(os.path.join("E:\\secStudy\\pythonProject\\xpath\\image_dir",path))
return True
else:
os.chdir(os.path.join("E:\\secStudy\\pythonProject\\xpath\\image_dir",path))
return True

#获取下一页链接
def next_page(html):
next_url = html.xpath('//a[@class="next"]/@href')
#拼接
if next_url:
next_url = 'https://www.4399dmw.com/' + next_url[0]
# print(next_url)
return next_url
else:
return False

#总的爬取函数


def spider_4399dmw(url):
#图片的xpath
#result = html.xpath('//div[@class="lst"]/a[@class="u-card"]/img/@data-src')
#标题的xpath
#result = html.xpath('//div[@class="lst"]/a[@class="u-card"]/div[@class="u-ct"]/p[@class="u-tt"]/text()')
headers = {
"User-Agent":ua.random,
"Cookie":"UM_distinctid=18b703032a8f0b-02226ea1833d6e-26031151-384000-18b703032a91af9; Hm_lvt_6bed68d13e86775334dd3a113f40a535=1698394289; a_180_90_index=1; CNZZDATA3217746=cnzz_eid%3D663098020-1698394289-%26ntime%3D1698394702; Hm_lpvt_6bed68d13e86775334dd3a113f40a535=1698394702; a_980_90_index=1; a_200_90_index=5",
"Referer":"https://www.4399dmw.com/donghua/"
}
#代理

logging.info("开始爬取:"+url)
resp = requests.get(url=url,headers=headers)
#print(resp.status_code)
#print(resp.text)
html_text = resp.content.decode('utf-8')
html = etree.HTML(html_text) #解析为html对象
#获取当前页码
page = html.xpath('//span[@class="cur"]/text()')
#创建页码对应的图片文件夹
mk_dir("第"+page[0]+"页")
#title的xpath
title = html.xpath('//div[@class="lst"]/a[@class="u-card"]/div[@class="u-ct"]/p[@class="u-tt"]/text()')
#img的xpath
image_src = html.xpath('//div[@class="lst"]/a[@class="u-card"]/img/@data-src')
# print(title)
# print(image_src)
#在链接前拼接http
image_url = []
for i in image_src:
image_url.append('http:'+i)
#print(image_url)
#保存图片
#1.请求图片的url 2.将请求的内容保存为图片
for nurl,ntitle in zip(image_url,title):
save_image(nurl,ntitle)
#如果存在下一页,则递归调用函数爬取下一页图片
if next_page(html=html):
spider_4399dmw(next_page(html))
else:
logging.warning("无法找到下一页,已完成所有爬取!")


spider_4399dmw(url)
#read_proxy_file(filepath)]
#logging.warning(get_proxy())

image-20231115150544471

image-20231115150557127

将本地文件存储到服务器上

1.检查服务器上的路径(/root/spider_img)

2.使用sftp将文件发送上去

使用os.walk进行递归读取时注意,分为3个部分:文件夹路径、空列表、图片名称列表

image-20231115152605742

代码:

1
2
3
4
5
6
7
8
9
10
11
12
13
14
15
16
17
18
19
20
21
22
23
24
25
26
27
28
29
30
31
32
33
34
35
36
37
38
39
40
41
42
43
44
45
46
47
48
49
50
51
52
53
54
55
56
57
58
59
#!/usr/bin/env python

import os
import paramiko

#远程服务器连接信息
hostname = '10.210.100.148'
port = 22
username = 'root'
password = '123456'

#本地图片文件夹路径
local_image_folder = 'E:\\secStudy\\pythonProject\\xpath\\image_dir'
#远程服务器上的目标路径
remote_target_path = '/root/spider_img/'

#检查远程服务器上的文件夹是否存在
def check_remote_dir(sftp,remote_folder):
#1.检查远程路径是否存在,如果存在就进入路径
#2.如果不存在,则创建改路径
try:
#尝试进入该路径
sftp.chdir(remote_folder)
except IOError:
#路径不存在,创建
sftp.mkdir(remote_folder)
sftp.chdir(remote_folder)

#传送图片上去
def upload_images(local_folder,remote_folder,ssh_client):
#打开sftp
with ssh_client.open_sftp() as sftp:
#创建或者进入远程文件路径来确保路径正确
check_remote_dir(sftp,remote_folder)
#递归遍历本地文件夹
for root, _,files in os.walk(local_image_folder):
for filename in files:
#本地单个文件路径
local_filepath = os.path.join(root,filename)
#服务器单个文件路径
remote_filepath = os.path.join(remote_folder,filename)

#输出上传信息,包括本地文件路径和远程文件路径
print(f'uploaded:{local_filepath} to {remote_filepath}')
#上传文件
sftp.put(local_filepath,remote_filepath)

try:
#建立ssh连接
ssh_client = paramiko.SSHClient()
ssh_client.set_missing_host_key_policy(paramiko.AutoAddPolicy())# 设置自动添加远程主机密钥策略
ssh_client.connect(hostname,port,username,password)
upload_images(local_image_folder,remote_target_path,ssh_client)

print(f'All images successfully uploaded to {hostname}:{remote_target_path}')
except Exception as e:
print(f'Error:{e}')
finally:
ssh_client.close() #最终关闭ssh连接

image-20231115153011023

image-20231115152835896


xpath学习
http://example.com/2023/11/27/xpath学习/
作者
r1
发布于
2023年11月27日
许可协议